Product Reviews
Instant Pot Max Takes Multicooker to Next Level
By Greg Gonzales
The Instant Pot Max is the latest step forward for the Instant Pot line, with new features and functions to appeal to the device’s cult following ― it cooks at 15 psi and therefore faster than previous models; the control panel is a touchscreen that allows users to release the pressure without putting their hands near the release valve; it can stir food using pressure bursts; and it also has a sous vide and canning feature.
Setup and Touchscreen
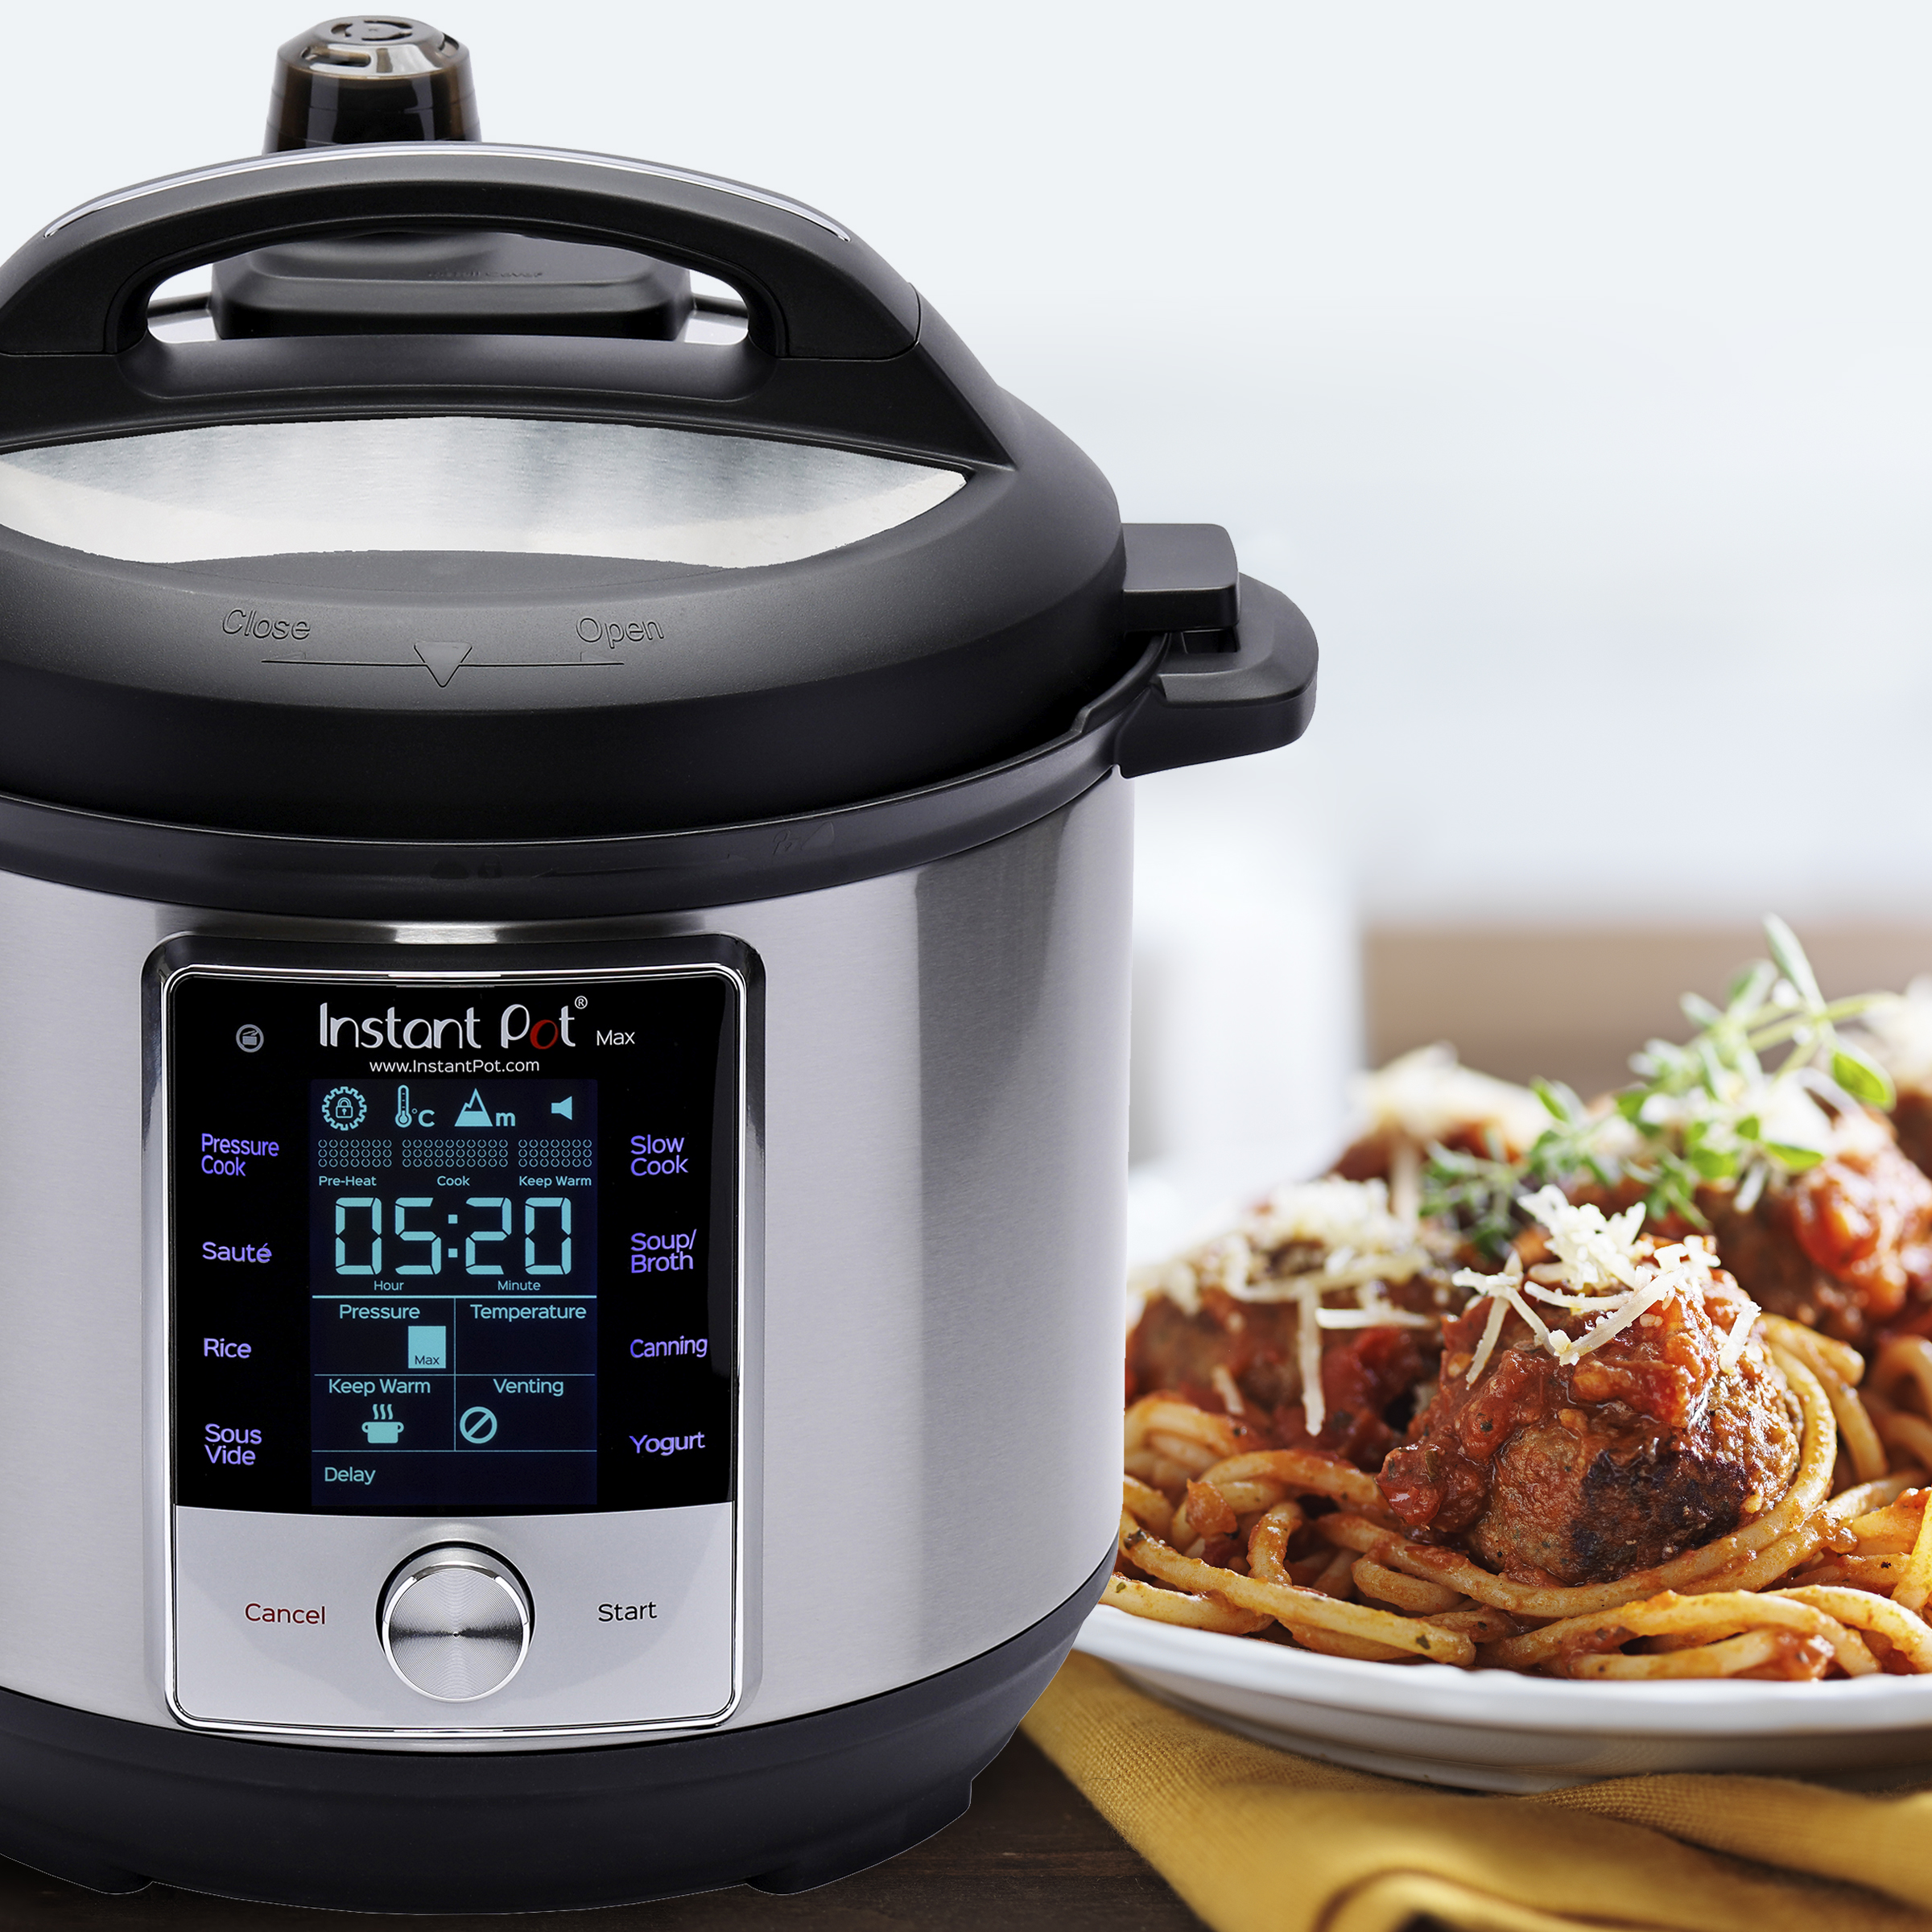 The Max was extremely easy to set up in just a matter of minutes. Out of the box came the unit itself, the cord, mini silicone gloves, a rice cup, a soup spoon and rice paddle, steam rack with handles and a condensation collector. However, it doesn’t include bags or a vacuum unit for the sous vide function, so I had to borrow and buy those separately ― which makes me thankful for my foodie friends, as those things can get pricey!
Sous Vide Salmon
The toughest part about the sous vide function was prepping the salmon. Picking out pin bones is never fun, but my girlfriend and I split the prep, so we managed to get the pin bones out, skin off, and herbs and spices rubbed on before the unit even got to temperature. One issue with the sous vide function is that the pot isn’t quite big enough for large portions, but with small bags and single portions, the Instant Pot Max will work just fine. Another small issue we ran into was that the sous vide function didn’t quite cook the salmon all the way ― but a short sear on the skillet right out of the Max, and we had perfect flaky sockeye salmon on our plates, with some chardonnay to match.
Pressure-Cooked Salmon
With some salmon left over, along with some potatoes and carrots, we skipped the recipe books and got to testing the 15 psi pressure cook function. The idea here was to compare the timing with the estimated time on recipes for the old cookers. Using the Max setting on the Instant Pot Max means the food should be done about 15 percent faster than the high setting. However, it didn’t really work out that way, and cooked in about the same time as the Instant Pot Duo, in just a few seconds over 2 minutes.
Instant Pot Max: Not Quite the First Canning Cooker
Using the Instant Pot Max to can food is a bit more hands-on than a push on the touchscreen ― and it’s not yet approved by the USDA, so I didn’t give it a go. According to the USDA and Instant Pot, some canning methods ought to be forgotten completely when it comes to using pressure cookers, as electric cookers might not be able to meet the temperature and pressure requirements to kill off deadly microbes. For now, I’ll wait for the next model, just in case.
Overall, the Instant Pot Max functioned perfectly, and my clothes soaked up the scents of the delicious spices and herbs on the salmon. Though I probably wouldn’t shell out $200 for a new one, especially since I already have the Duo, it’s certainly an investment worth making for people who don’t have one and want to try sous vide without extra equipment.
Getting Gritty with DMT Diamond Sharpeners
 By Greg Gonzales
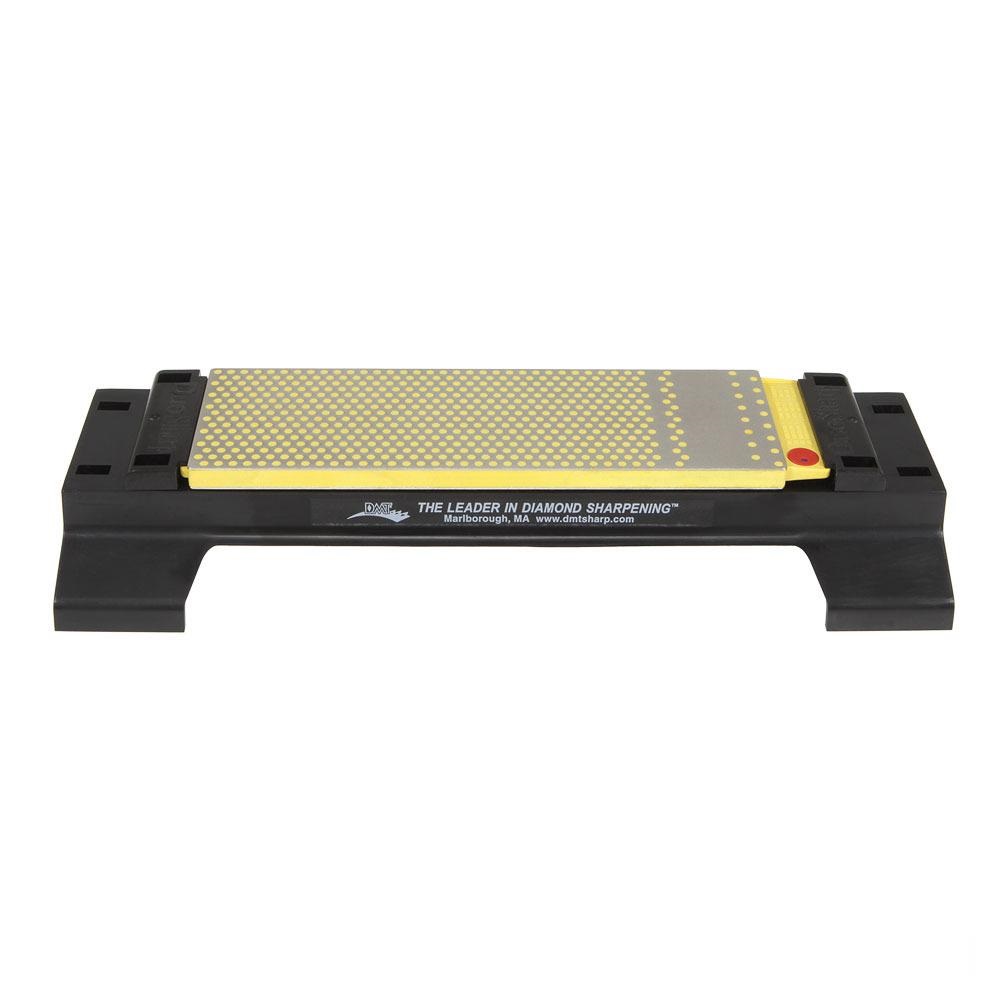
Before December 2017, I’d never sharpened a knife. As a kid, I used to mimic the motion, but I didn’t know the finesse and subtlety that went into perfecting a blade’s edge. So when DMT’s DuoSharp® Bench Stone with Base and the Diamond Steel™ arrived in the newsroom, I jumped at the chance to get myself a crash course and see what sharpeners are all about.
Out of the box, I could tell there was a steeper learning curve for the bench stone than there was for the steel. Not that the bench stone was complicated — it came with 12 rubber feet to place on the bottom for stability. The edge had two grits already locked into the base by two clips, and removing the clips to change grit was as easy as giving them a pinch from the bottom. The steel was even less complicated: remove from box, then rinse. In minutes, I was ready to sharpen, and test out the results with carrots, onions and paper (after a few YouTube instructional videos, that is).
The Tomodachi All-Purpose 6-inch knife from my childhood wasn’t looking so hot when I first got to it. Tiny dents, dulling and other imperfections made slicing through even the softest foods a bit rough; the blade would snag on food and then aim for my fingers.
After about 10 minutes of sharpening on the fine grit, I ran the onion test to test basic sharpness; onion skin is oily and slick, so I was impressed to find that my knife could now catch on the skin with relative ease. The movement wasn’t quite as smooth as I would have liked, though. Each slice still caught a little bit, and I could tell that the blade was uneven. After about five minutes more of the fine grit on each side, and another five on each side with extra fine grit, the Tomodachi was slicing paper-thin tomatoes and cutting carrots like butter. When I did the paper test, the knife slid just as easily through the page as carrots, like I’d expect from a crafter’s razorblade. The DMT Bench Stone (W8) had my knife slicing like it was 2008 instead of 2018.
According to the instructions, I could have sharpened dry, but I went wet because the fluid floats away the swarf (waste material), which keeps the stone from clogging. Though my results were exactly what I was looking for, my only regret was that I couldn’t repair the worst of my knives, which was rife with dents and extensive damage from drawer storage and misuse. For that, I’d need more than the fine and extra fine grits that came in the package. DMT’s Diamond Sharpener grits come in extra extra coarse, extra coarse, coarse, fine, extra fine and extra-extra fine, all color-coded on the package and on the edge itself to help users stay organized and efficient. For home cooks and chefs who are serious about keeping their knives in perfect working condition, I recommend getting a wider range of grits.
The Diamond Steel was a cinch to use, even for a beginner like me. All I needed was a cutting board, the steel and a slightly damaged Hoffritz knife. Again, getting the stroke right from heel to tip took a bit of practice and some direction from strange YouTubers, but I had it down in less than 10 minutes. Since my knife wasn’t too badly damaged, it was slicing paper-thin tomatoes by the time I finished practicing!
Nice as the bench stone was for sharpening, I rarely have damaged knives to fix, so it takes a little too much space in my studio-style apartment. However, DMT’s sharpeners proved to be just what I needed to get a couple knives back into working condition. These are a must-have for anyone who uses a knife every day, though most of us home cooks and small-living folks will be fine with the Diamond Steel on its own, which fits in my knife block or kitchen counter carousel.
Product Review: Trudeau’s FUEL Collection
By Micah Cheek
In the spirit of avoiding a sad desk lunch, I packed a lunch using some items from the FUEL Collection, a lunch carrier set from Trudeau.
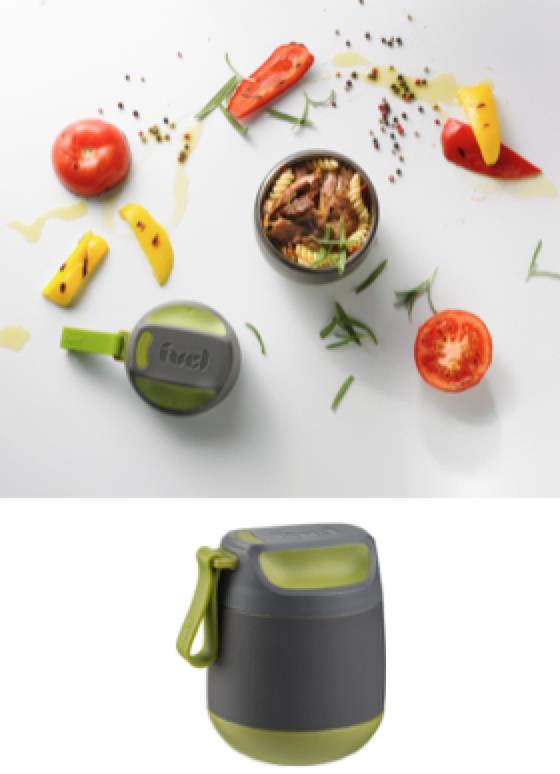 I prepared a red pepper salad for lunch, along with pecans and chips, the most fragile snack I could think of. The red pepper salad went in the egg-shaped Stainless Steel Food Jar, which proved to be very leak resistant and kept my salad cold. The rounded edges make it attention grabbing, especially at a desk during lunch. The steel interior made cleanup easy. Additionally, the bare metal you see when you open the bowl matches nicely with the set’s color scheme. The Stainless Steel Food Jar has a suggested retail price of $24.99.
My chips went into an included Snack Pocket made of the same material as the main lunch bag. The Pockets have a suggested retail price of $12.99 for a two pocket set. The bag looks flat, but against all odds, my chips remained intact.
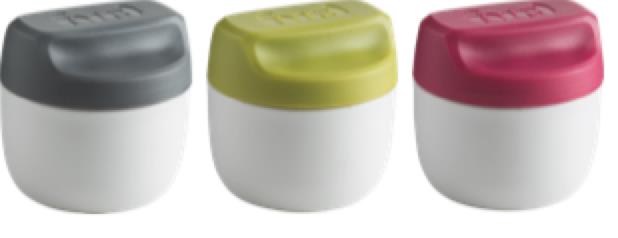 The Condiment Set features little condiment jars made to look like miniatures of the Stainless Steel Food Jar. I used one to hold vinaigrette for my salad. It performed admirably, not letting any oil seep into my lunch bag during transit. While it holds runny liquids like vinaigrette well, the Condiment Set is also sized to hold a sandwich-perfect portion of mustard or mayonnaise. You wouldn’t guess just by looking, but the FUEL Collection cutlery fits perfectly into the condiment jars, making products like jam and hummus an easy option. The Condiment Set comes in sets of three jars, and has a suggested retail price of $5.99.
A water bottle is also available for the collection. It only holds 15 ounces of fluid, but it is sturdily built and easily cleaned. The spout is wide enough that it could be effectively used for smoothies or unfiltered juices. The spout is also in a straw setup, with a flexible tip that won’t hurt your teeth if you bite it. Called the Splash Bottle, this bottle retails for $9.99.
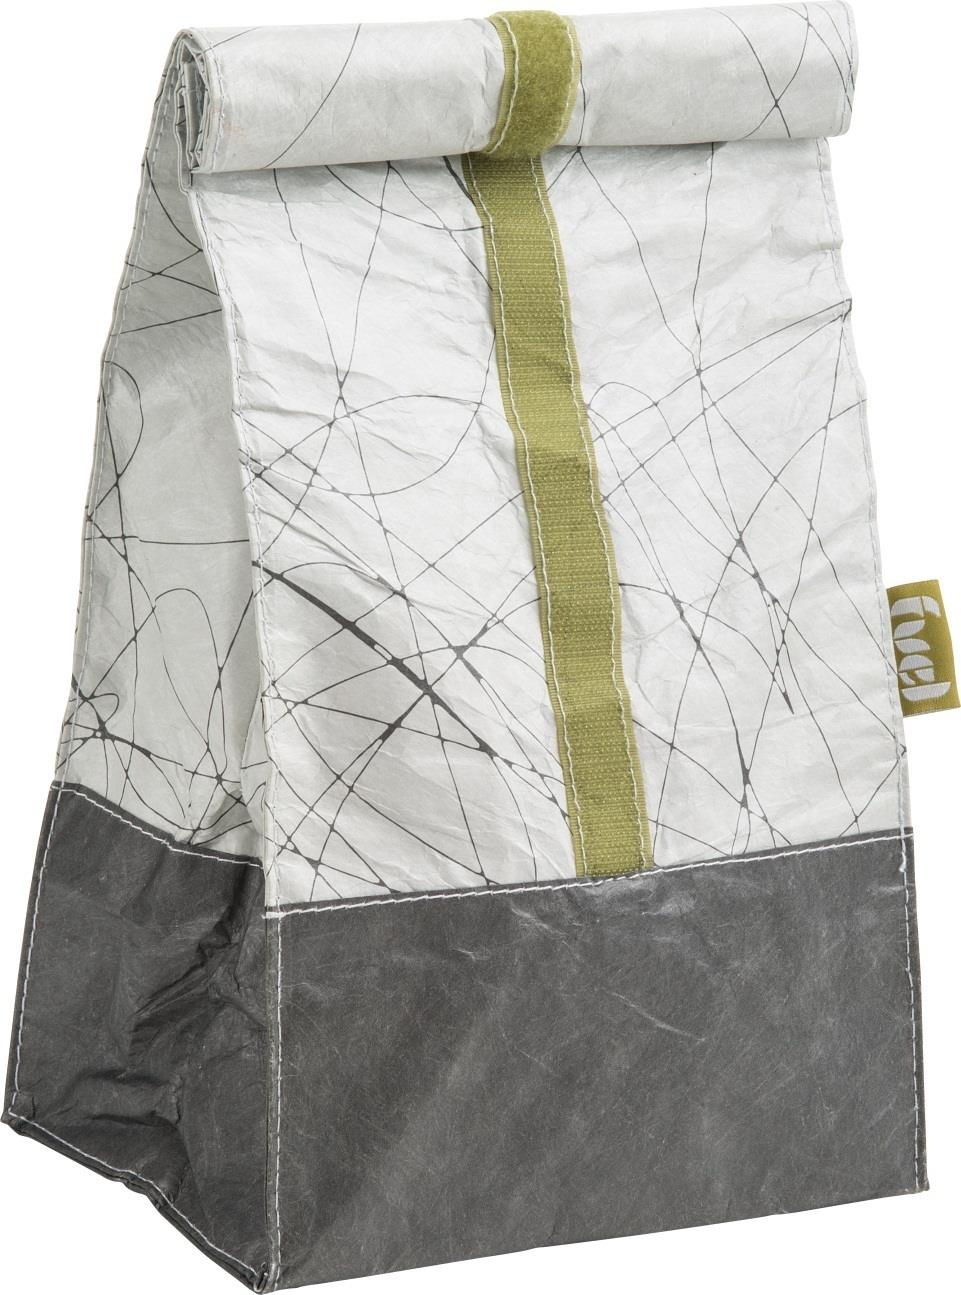 All the separate parts of the collection fit snugly into the Classic Bag, which has a papery plastic outside reminiscent of a brown paper bag, and a thermally insulated plastic layer inside. The bag follows a muted color pattern, centered around sage green, eggshell white and charcoal gray.
For someone who frequents the convenience store hot dog bar as often as I do, eating a real meal with color-coordinated containers is a refreshing experience. I think I enjoyed my meal more than I would have if I had packed it in a disposable plastic bag. The only thing I didn’t like about the aesthetic was the Snap Cutlery Set. While it worked perfectly well and was color coordinated, the proportions of the fork and spoon make them look like the entry-level silverware for toddlers. That said, their small size allowed them to fit into the bag efficiently with everything else. The Snap Cutlery Set retails for $5.99.
The use of Velcro strips to hold the Classic Bag and Snack Pocket closed was an interesting move away from the usual zipper sealing closures. My main concern with it was in washing out the bag, with the possibility of water getting trapped in the strip’s fibers. With hand washing, the bags cleaned up easily, and pressing a cloth into the Velcro fibers is effective at drying them out. The bags can be turned inside out, but I found it unnecessary for cleaning up dry snack residue. Unlike more traditional bags, the Classic Bag does not seal horizontally along the top. Two long strips of Velcro are laid out vertically along opposing sides of the bag. To seal, I rolled the top down so that one strip of Velcro comes in contact with the other, closing up just like an old-fashioned brown paper bag. It’s a system I haven’t seen in other lunch containers and is surprisingly effective. Even though most of the bag’s mouth isn’t held together, the rolling action that seals it is surprisingly strong, which allowed me to turn the full bag upside down and shake it without the Velcro coming loose.
Price may be a concern for some consumers. The full retail value of this entire lunch set is about $60, although the pieces are sold separately. However, the set looks composed yet casual, seals very well and is sturdy. All FUEL products are BPA-free as well and include a lifetime warranty. Many are available in Kiwi and Raspberry colors. This set is perfect for the customer who is willing to spend a little extra to have a lunch tote that will impress daily and last a long time or who’s picking and choosing specific containers to meet individual needs rather than splurging on the entire set at once.
Product Review: Not Just for Sack Lunches – U-Konserve To-Go Containers
By Lorrie Baumann
The camping trip I took to Grand Canyon in March didn’t exactly go as planned. Between the trip to the International Home + Housewares Show in Chicago followed immediately by three days in Anaheim, California for Natural Products Expo West and then coming back to the office to send the April issue of Kitchenware News & Housewares Review to print, I didn’t have a whole lot of time for last-minute packing, so when the Saturday morning that started my vacation week came along, I more or less threw my tent and sleeping bag, my campstove and cook pots and my new Lodge dutch oven and a lawn chair into the trunk of my car, and then I packed into my insulated picnic bag a week’s worth of frozen chicken thighs and some foil-wrapped turkey burgers and headed north.
By the time I got to Phoenix, I remembered that although I had the dutch oven, the charcoal and the fire starters and the foil-wrapped food to put in the dutch oven, I’d forgotten my tongs for arranging the coals around the oven. Fortunately, Phoenix has hardware stores, and I found one. Between Phoenix and Flagstaff, I remembered that I was also going to need an oven mitt because the dutch oven was going to be hot coming out of the fire pit.
It wasn’t until I had checked into my campsite at Mather Campground that I reconsidered my ill-advised choice to leave my hard-sided cooler behind once I’d seen how much food actually fit into the insulated picnic bag. Mather Campground is, well, infested is a harsh word, but it fits, so let’s use it. Mather Campground is infested with ravens who seem to enjoy nothing more than vandalizing the campsites of novices who are so foolish as to hang trash bags from the trees or leave their food supply outside in soft picnic coolers. I left my picnic bag in my car for a quick trip to the Canyon Village Market and General Store, where I bought a hard-sided cooler I could leave under my picnic table. And a bag of ice.
After these initial missteps, I had a wonderful week in Grand Canyon National Park, but now everybody I know has seen all the pictures they can stand of the scenery, the elk, the ravens and the squirrels, so I am going back to Grand Canyon later this month to get some new shots. This time, I am going to the North Rim, which is rather less developed than the South Rim, and I am determined to be rather less casual about the preparations.
This is why last weekend I bought four U-Konserve Medium To-Go Containers and two U-Konserve Large To-Go Containers. This time around, I plan once again to apply my preferred strategy of preparing and freezing my dinner choices ahead of time and then loading them into an ice chest to thaw slowly but stay chilled until time to cook them. Last time, I packaged everything up in double layers of aluminum foil, but as I was making those daily walks up to the trash receptacle to keep that foil out of the beaks of the pesky ravens, I was rather appalled at how much of it there was. I wanted a better solution – a way to freeze food and then cook it either over the campstove or in the dutch oven in the same container, but without wasting all that foil.
I want to be able to cook and eat out of the same container because Grand Canyon is, after all, in the midst of a desert, and water must be conserved. Every drop of water used by 5 million visitors to the South Rim each year comes from Roaring Springs, across the Colorado River on the north side of the canyon. It is transported through the Trans-Canyon Pipeline, which travels for 16 miles along the North Rim, across the Colorado River and then up the South Rim. Completed in 1970, the aluminum pipeline is well beyond its 30-year life expectancy, and the estimated cost to replace it is around $150 million. The water is precious, and my share of it will have to be hauled from a communal spigot to my campsite in whatever container I buy to replace the one the ravens pecked the hole in during my March trip. (I’m pretty sure that was just sheer petty revenge because I didn’t leave all that foil lying around for them to shred all over the campsite.) All of those considerations made stainless steel food containers an obvious choice.
 Of the available options, the U-Konserve containers looked like the best sizes for what I had in mind. Sticking to my goal of being better prepared this time, I tested the containers at home in my back yard before committing to taking them to Grand Canyon with me. I had a few questions to answer: Would these containers actually work as pots on my butane camp stove? These containers claim to be leakproof, but are they really? And will the medium container hold enough for a full meal, or will I need to invest in more of the larger size? How will these containers fit into my dutch oven? And finally, are these containers worth the price, because stainless steel is not cheap?
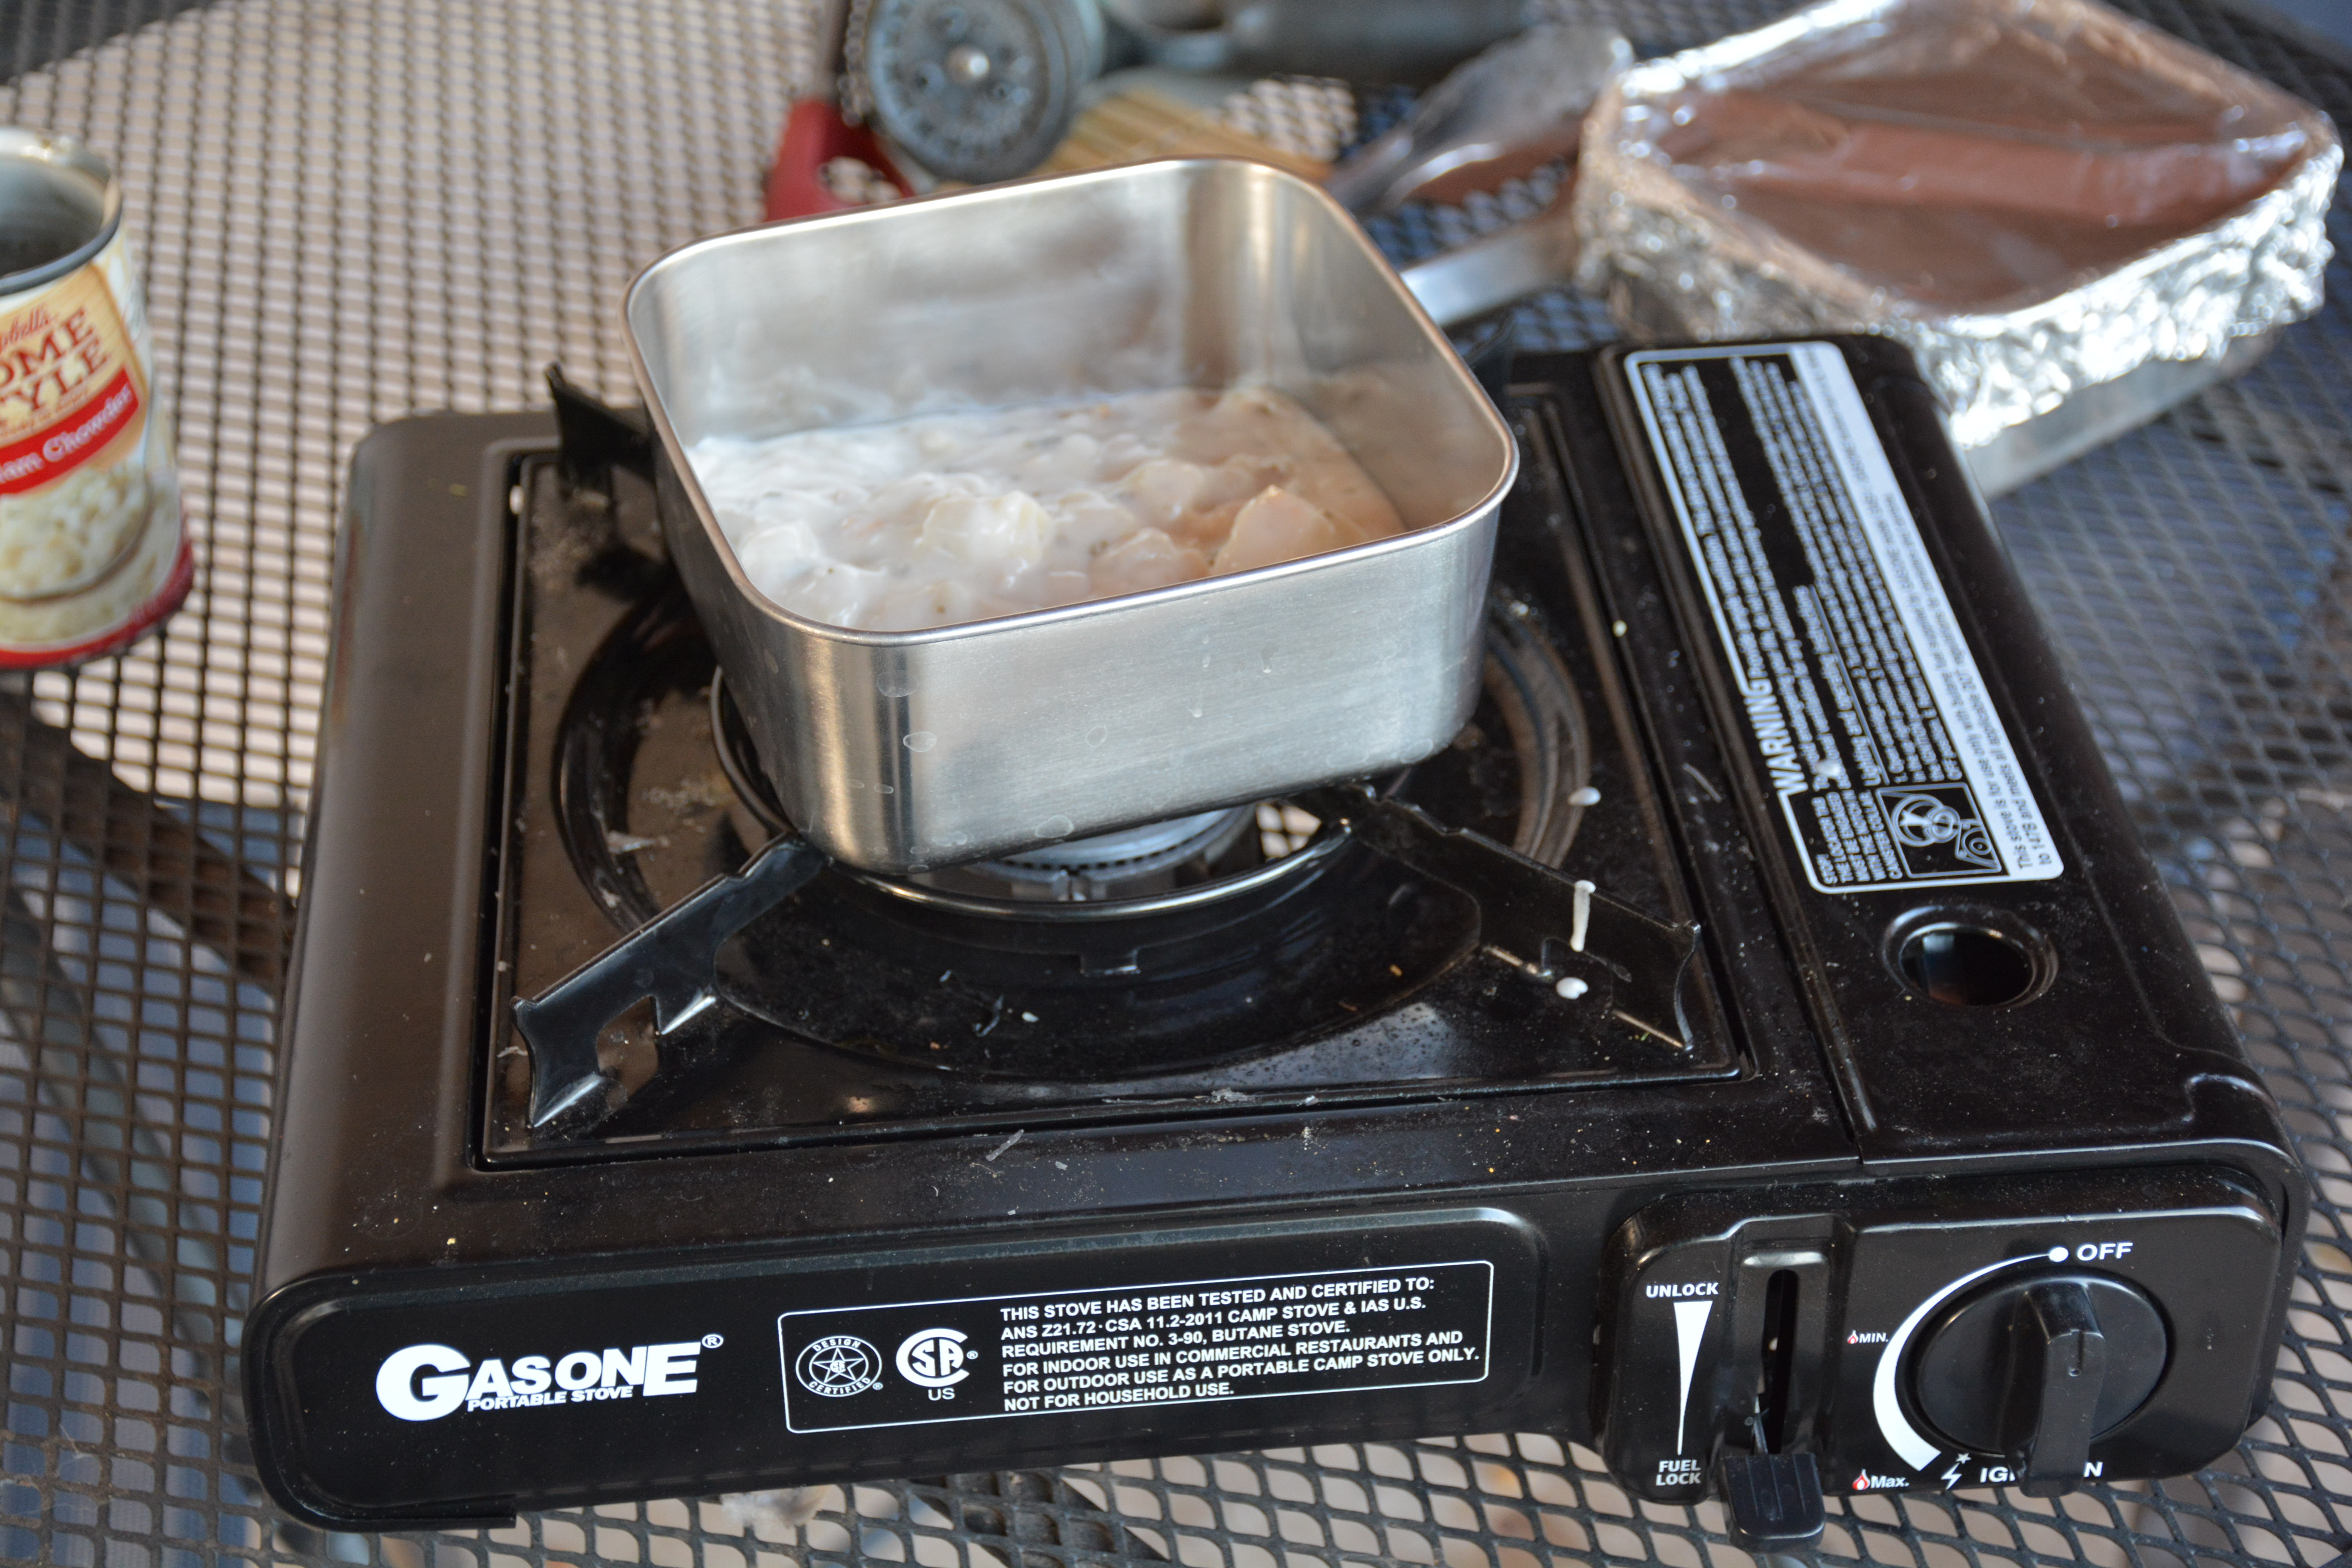
To answer the first three questions, I went the easy route and just opened a can of Campbell’s soup and dumped it into one of the Medium To-Go Containers and sealed it with the plastic lid. The lids are heavy BPA-free plastic that snap down firmly but without particular difficulty and open easily too. I picked up the container and sloshed it around a bit, then held it upside down and shook it a few times, then did it all again. When I set it back down, I could see that the soup seemed to have crept up into the seal on the inside of the container, but none of it had leaked out. I put the soup-filled container into the freezer and froze it solid. When I took it back out of the freezer, the lid needed only a few seconds to warm before it was willing to flex enough to come off the container – or maybe that was my hands were cold from handling the frozen steel – but then it peeled off easily without showing any signs of brittleness. If I should lose a lid somewhere, I can replace it by ordering it directly from U-Konserve through the company’s website.
It was then that it occurred to me that it had been totally unnecessary to freeze the actual soup I was then planning to eat – I could have done the exact same test by freezing a block of water, which I could have made good use of by emptying it out of the container onto my garden, so in the interests of having dinner on the same day, I decided to put that container of soup back in the refrigerator to thaw for another day, and I opened another can of soup and dumped it into another of the containers for the second phase of the experiment, which was the cooking test over the butane camp stove. Here, once again, the container performed flawlessly. About all you can ask for from stainless steel is efficient and even heat conduction, and what you want from a camping pot is that it sits stable on your stove, holds a reasonable amount of food and doesn’t make you feel like too much of a dork when you’re eating from it. All good here.
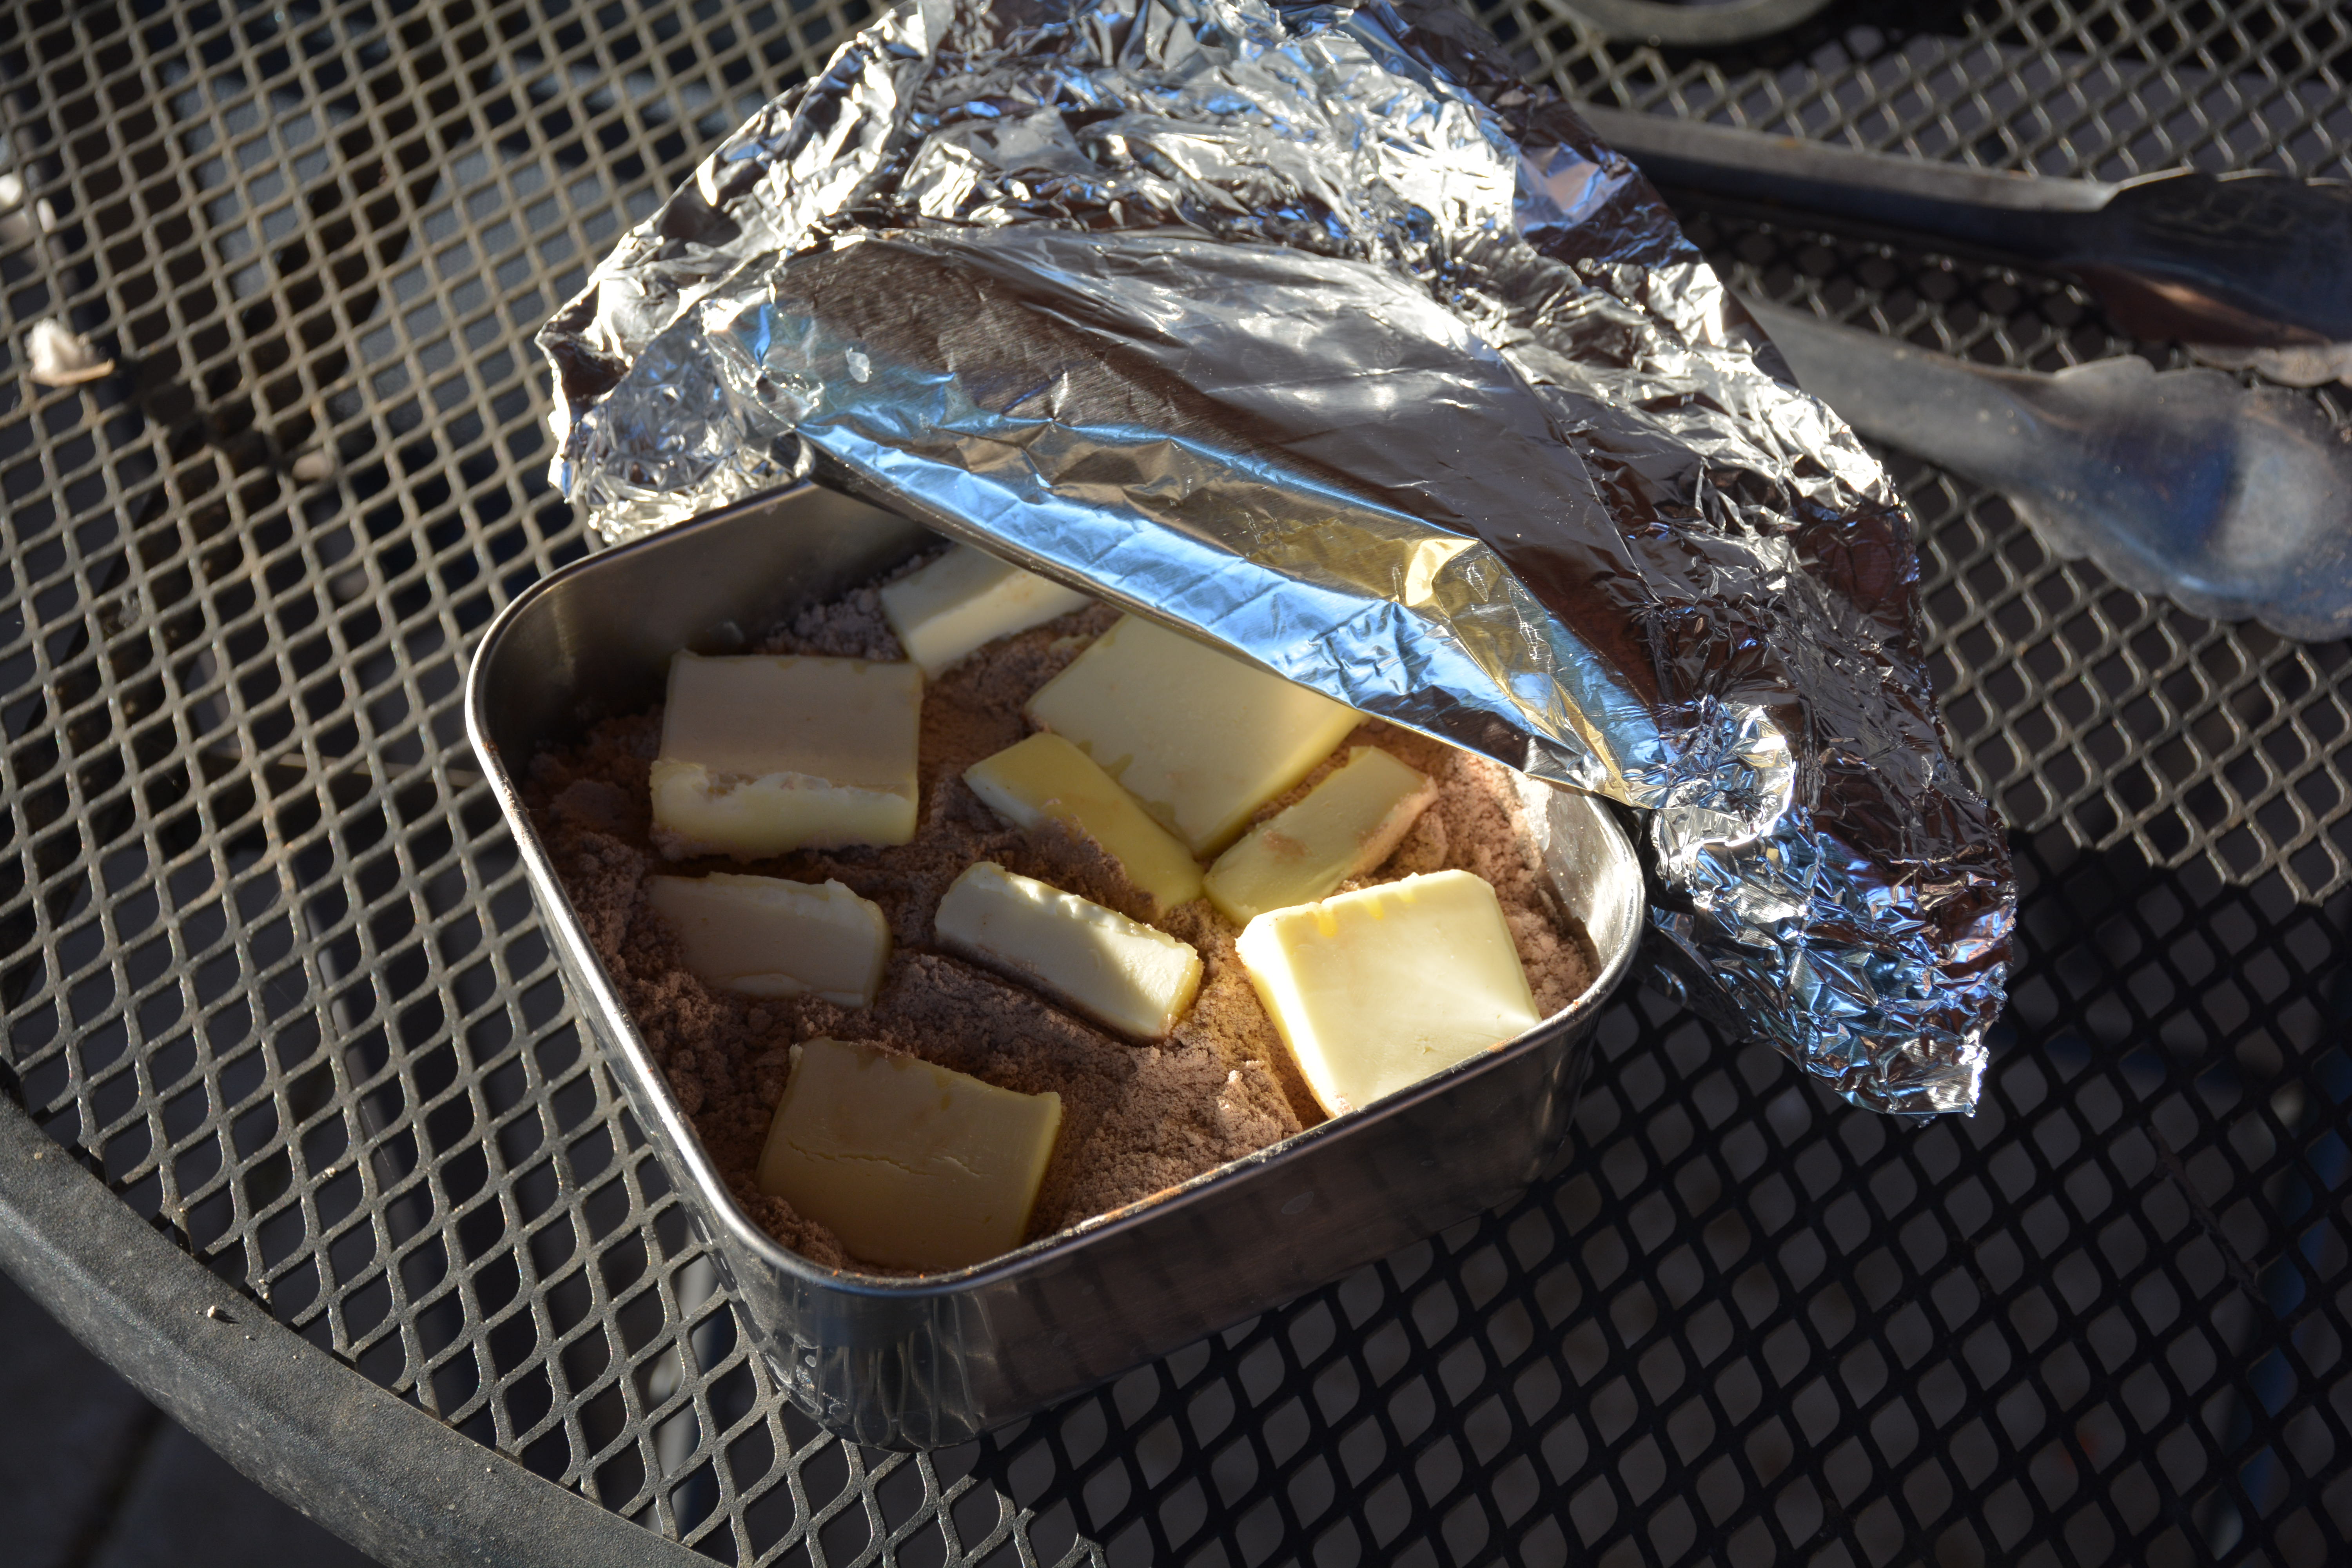 Then for the final phase of the experiment, I lit some charcoal and fetched out the dutch oven for a dump cake trial. This actually took me two tries, with one attempt with the container set directly onto the floor of the dutch oven and then a second attempt with the container set on a rack inside the dutch oven. Both times, I made the dump cake with half a can of apple pie filling, a quarter of a chocolate cake mix and half a stick of butter. On the first attempt, the cake mix on top hadn’t cooked thoroughly before the pie filling on the bottom had caramelized and began sticking to the pan. For the second try on the rack, I baked it an extra five minutes or so, and it came out perfectly. For the record, that’s 40 minutes with 13 coals underneath and nine coals on top of the dutch oven.
So, all things considered, my only question now is whether I really have enough of these extremely useful containers. They were easy to label with a Crayola washable marker on the side, and they’re versatile and sturdy enough to justify the price tag. I feel more prepared for Grand Canyon now.
Prodyne Infuse & Chill Review
By Micah Cheek
Fruit-infused water is having its moment in the sun, being extolled by detoxification fans and advocates of healthier beverages in general. Prodyne’s Infuse & Chill fruit infusion ice molds promise to start the infusion process in the freezer, getting fruit flavors into water in the form of fruit-filled ice.
According to Prodyne, the Infuse & Chill uses the expansion of water turning into ice to massage flavors out of the fruit as it freezes. This allowed me to use large pieces of fruit, and I wasn’t required to macerate anything. Soggy fruit chunks weren’t a problem.
For my infusion, I filled my mold with ginger, apple, pear and orange pieces. The remainder of the space in the mold was then filled with water before the lid was sealed on. The mold’s lid sealed well, enough that I was able to store the mold on its side in the freezer rather than standing up as recommended. When I took the mold out of the freezer, I was surprised at how easily my infusion icicle loosed itself from the mold. Furthermore, the icicle was surprisingly solid and rattled around in my bottle without breaking apart before I added water.
My icicle started changing the water’s flavor immediately. The more volatile compounds in the ginger and orange were released first, giving the water a spicy, citrusy taste until the rest of the flavors came out to play. Everything blended into a fruity, vegetal taste that was refreshing without getting too sweet. I was pleasantly surprised to get this much flavor without mashing any fruit, shaking the bottle, or letting the water sit all day to infuse. The mold and lid both cleaned up nicely in the dishwasher, and the squishable silicone made storage easy. At a suggested retail price of $14.99 per set, the Infuse & Chill is a functional product for infusion fans.

You must be logged in to post a comment.